With no sign that Nintendo ever fixed this problem with a better design, buying a new Joycon for 50$ seem a waste of money.
Fortunately, there are quick an cheap ways to resolve this.
I tested the 3 solutions below and sorted them by order of price and durability.
Solution #1: target a very specific thumb stick location with a contact cleaner.
 The very first method is to use a fast drying contact cleaner but not anywhere: to be effective, the cleaning solution must make its way inside the thumb stick.
👍 The quickest and cheapest solution by far.
I've used it on several very badly affected joycons that could not be calibrated anymore. The result is instant.
👎 You're good to go for a while but will obviously need to repeat the process in a few weeks.
Solution #2: replace the thumb stick
 It's not difficult, but it's sure a delicate operation because you'll have to deal with very small screws and ribbon connectors.
The price of a joycon alone should not exceed 10$, and in some places you can even get 4 replacement joycons for that price!
The main things you need is a tri-wing screwdriver (just to open the casing, the other screws are standard Phillips), and a pair of tweezers. If you don't have those tools already, you can get a pair of thumb stick as part of a full joycon repair kit for less than 10$.

The tri-wing screws have the reputation to be fragile, so do not apply too much force and take your time to avoid scratching them.
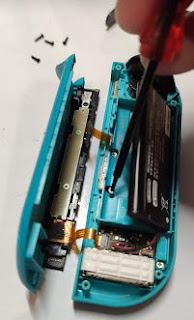
The thumb stick module is easily accessed behind the battery by unscrewing 3 screws (2 under the battery, 1 on the bottom right of the joycon.
You need to lift small tabs (gently! they snap out of their place sometimes!) to release the ribbons, one of them needs to be removed just to give access to one of the screws retaining the thumb stick module. You'll find the tweezers very helpful for that part.
 You'll find detailed and illustrated instructions on instructables.com.
In this example, the procedure goes as far as opening the thumb stick to clean the inside. I don't especially recommend to go that far as the tiny tabs holding metal casing can easily break. The above Solution #1 does work just as good.

👍This is a quite simple but delicate solution and still within a reasonable budget. It might be worth buying at least 2 pairs of thumb sticks to plan ahead.
👎While this is going to last longer than just a cleaning, the new thumbsticks will eventually also wear out.
Solution #3: Buy a 3rd party joycon alternative
The best long-term solution to the joy con drift? Don't use the joy cons at all!There are many wireless imitation of the Joy Con for half the original price, but I can't speak for their durability.
Instead, I tried and tested for a good while now a non-wireless alternative: "The HORI Split Pad Pro - Daemon X Machina Edition for Nintendo Switch".
These controllers need to be attached to the console to work. They offer a sturdy alternative to the tiny joycon, with a much better grip and larger and more resistant thumb sticks. They cost about 38€ on Amazon.co.uk.
👍Sturdy and comfortable.
👎Not wireless.


No comments:
Post a Comment
Note: Only a member of this blog may post a comment.